
Blackmagic 6K for Instagram Story Model Shoot
Welcome to my latest videography tutorial blog post. I'm Blake Anderson, and today I'm excited to expand on my YouTube video where I walk through how I shot at the RC Harris Water Treatment Center here in Toronto, Ontario. If you're searching for a Blackmagic Pocket Cinema Camera 6K tutorial focused on vertical video for Instagram, high-resolution workflows, or adapting to real-world shooting conditions, this post dives deeper into my process. I'll share practical tips on using the Blackmagic Pocket Cinema Camera 6K for model shoots, drawing directly from my hands-on experience to help you elevate your own projects. Whether you're a beginner experimenting with 6K raw footage or a pro optimizing for social media, let's explore how this camera can transform your videography.
Choosing the Right Equipment: Blackmagic 6K vs. Sony A7 IV
For this shoot, I shot primarily using my Blackmagic Cinema 6K camera, and I typically will shoot with my A7 IV, but I wanted to start experimenting a little more with the Blackmagic 6K. Typically for events and for other projects, I would rely heavily on my Sony A7 IV, as you're still getting a good image in 10-bit and in 4K. But with the Blackmagic 6K, obviously you can shoot in raw and get a 6K image. The trade-off often is that it's not image stabilized, so the footage you typically want to ensure that you're getting very stable footage.
I found the Blackmagic 6K obviously doesn't have the same image stabilization that a Sony A7 IV does. But that being said, I still captured this shoot using the Blackmagic 6K in that I relied on just slowing down the footage a bit, which helped a little bit with the micro jitters that can often occur. And then I also stabilized it—typically I can also use a stabilizer and that's definitely an option. Just in this shoot, I didn't have my stabilizer with me, or my gimbal rather. But I decided to just, within my own, using my own hands.
In post, I slowed down the footage. I also stabilized the footage the best I could in Final Cut Pro, which sometimes doesn't always work if the image is too close, like the subject's too close and the background, there's not a lot of differentiation in the image—then image stabilization tends to not work as well. Have you encountered similar challenges with handheld shooting on the Blackmagic 6K? Share your tips in the comments below—I'd love to hear how you handle stabilization in your workflows.
Maximizing Image Quality for Instagram: Vertical Shooting in 6K

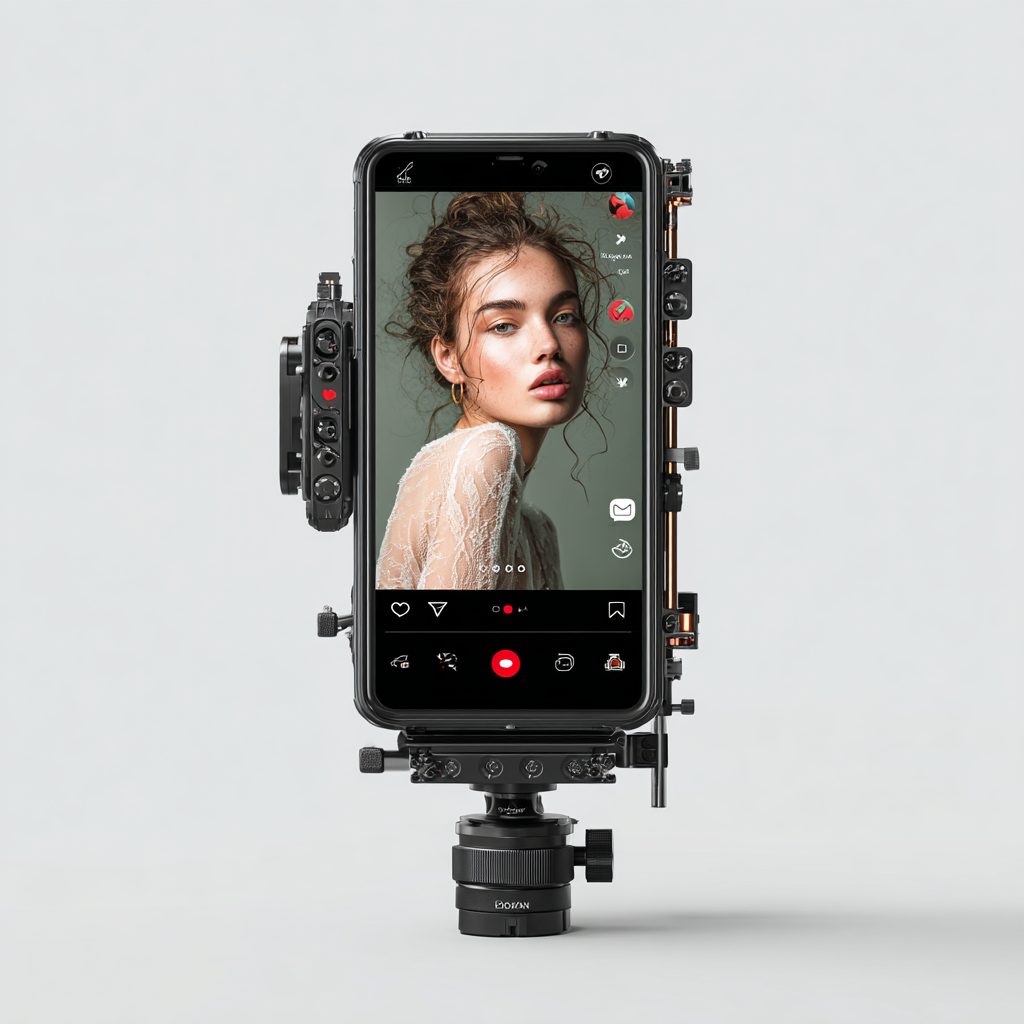
So I shot on the Blackmagic 6K, and with the Blackmagic Pocket 6K, as I mentioned, you can shoot in 6144 x 3456, so that allows you to shoot vertically, and then you're capturing the most of the image and using most of the sensor to capture the highest quality video that you can. If you're shooting for Instagram, which typically for this project I was, you can ensure that you're getting the entire image and you're not cropping in post. So by shooting in a vertical dimension in 6K, then I exported that in DaVinci Resolve and I then exported a 6K file.
But then in Final Cut Pro, I put it in a 4K timeline, and that allowed me to work with the image a bit more. You can zoom in a little bit more if you want, but within this project I kept it at the full 6K, but within the 4K timeline. And so that's just my workflow, and I think it turned out well in the sense that there's a high dynamic range in the image, ensured sharpness, and yeah, I found that it was great for this project. This approach is perfect for Instagram story videography or vertical content creation, where maintaining sensor detail without post-cropping keeps your footage crisp and professional. If you're optimizing Blackmagic 6K vertical video for social media, what resolutions do you prefer? Let me know in the comments to spark some discussion.
Exploring Preset Options: Streamlining Your Blackmagic 6K Workflow
I just wanna briefly mention some tips for using the Blackmagic 6K. One aspect that I really like about the camera is the menu system in that it's very, I find very intuitive and something that you can easily get your hand and get a handle of. I'll link in the description of the video where I took a training for the camera and went through all the different menu and different functions—I highly recommend that video here.
But what the Blackmagic 6K allows you to do is you can set presets within the menu system. You click the presets, and then it gives you the options of having many different presets. And in my workflow, I have a 6K preset that shoots in 24 frames per second. And then I also have a 6K within 50 frames that's converted to a 24 frame timeline. So what that does is Blackmagic will automatically, once it's exported, convert it to a 24 frame timeline. And so I just like this feature as you're capturing it entirely in slow motion, and then you're slowing it down automatically in camera.
And some people might want to just shoot in 50 frames or 60 frames and not convert it, but I just found my workflow that it worked. So another preset I have is shooting in—so the thing about Blackmagic is you can shoot in 50 frames in 6K, but you unfortunately can't shoot in 60 frames, but you're still getting a slowed down image to a 24 frame timeline. So I do like that option, but when I have my third preset is that I can shoot in 4K on the Blackmagic and convert it to a 60 frame file. So that's another preset option I do.
And then I also have options for 120 frames for a 2K file. Then I also have ProRes—I have ProRes and 4K with HQ, so it's using 4:2:2 ProRes. That can be a good option in case you want to shoot, you get a little bit of a smaller file and you're still getting ProRes high quality. So definitely, there's many different features of this camera, and I just wanted to highlight that it allows you to, with these presets, simply go between your menus and not have to configure it when you're on set or shooting.
It's hard sometimes to go into all those navigations and you don't really want to be distracted that way. So I find the Blackmagic 6K is great for setting up those presets—that way you can quickly get at your menu system. For videographers tackling Blackmagic 6K slow motion presets or frame rate conversions, these options make event shooting or model sessions much more efficient. What's your go-to preset for Instagram videography? Drop a comment and let's compare notes.
Adaptation to Changing Conditions: Low-Light Shooting with the Blackmagic 6K
One thing to think about is it was getting dark and I had to up the ISO—I was shooting in beginning at 50 frames as I mentioned, but then I slowly had to open it up to 24 frames. That way I'm getting more light into the sensor, and then I up the ISO a bit as it's starting getting darker, shooting in 24 frames and 16,000. Typically I'm shooting in 800 as that's the base.
This flexibility is key for outdoor model shoots in Toronto, where lighting can shift quickly during golden hour or dusk. By adjusting frame rates and ISO on the Blackmagic 6K, you maintain quality without compromising your creative vision. If you've adapted Blackmagic 6K settings for low-light videography, share your experiences below—your insights could help fellow creators!

Conclusion: Elevate Your Videography with Blackmagic 6K Insights
In this video and blog, I covered how to use your Blackmagic 6K for model shoots and how to think about it for Instagram and ways to use it in your own projects. From experimenting with raw 6K footage to leveraging intuitive presets and vertical shooting for social media optimization, this setup proved ideal for my RC Harris Water Treatment Center project. Thank you for reading—if you found this Blackmagic Pocket Cinema Camera 6K tutorial helpful, please like, subscribe to my channel, and leave a comment with your thoughts or questions! What's one tip you'll try in your next shoot? Let's engage in the comments and build our videography community together.