
Advanced Post-Production Workflow for Instagram Videos
Hello, everyone. This is Blake Anderson, a videographer based in Toronto, Ontario. In this blog post, I aim to supplement my YouTube video by providing a more advanced exploration of how I created an Instagram video at the Canadian National Exhibition (CNE) with a couple of models. I will emphasize my post-production workflow, particularly the use of various assets to treat the video, while drawing closely from the insights shared in my video transcript. Whether you are refining your Instagram videography techniques or seeking efficient color grading tips, this guide offers practical strategies to elevate your projects. Stay tuned as I walk you through the process step by step.
Shooting Fundamentals for Optimal Instagram Format
To begin, consider how the initial shoot sets the foundation for seamless post-production. I shot this video at the CNE in Toronto with two models, using my Sony A7 IV camera primarily in a flat profile. During the daytime, I utilized Picture Profile 8, which is S-Log 2, to capture a flat image that preserves dynamic range for later grading. As it transitioned to nighttime, I switched to Picture Profile 11, configured as a Cine tone, to avoid overexposure and minimize unwanted noise in the shadows—noise that can arise when the sensor struggles with low-light conditions.
A key point to remember for Instagram videography is the vertical format. I positioned the camera vertically to capture the full sensor area, avoiding unnecessary cropping in post-production that could compromise image quality. Some modern cameras offer open-gate recording for easy cropping, but shooting vertically ensures you maximize the sensor without creating challenges later. If you are interested in optimizing your Sony A7 IV footage, I recommend checking my previous video on achieving the best image quality from this camera.
Establishing the Editing Sequence in Final Cut Pro
Once the footage is captured, I import the clips into Final Cut Pro and set up the timeline in vertical story dimensions—approximately 1080 by 1920 pixels, the inverse of standard 4K. This allows the videos to fit naturally without distortion. For clips shot at 60 frames per second, I enable automatic speed ramping to conform them to a 24-frame timeline, eliminating the need to adjust each clip manually and accelerating the workflow.
In my process, I focus on selecting the best shots and ensuring stability. I utilize Final Cut Pro's stabilization feature, which generally performs well, though I carefully review each clip to avoid any "wonkiness" from excessive movement. This step is crucial for professional results in Instagram video editing.
Rather than reserving color grading for the final stage, as in larger projects, I prefer an early grading approach for smaller edits like this. I compile a longer sequence of stabilized shots, apply preliminary color adjustments, and export as an H.264 file with baked-in grading. This creates a lighter file that is easier on the computer, allowing me to concentrate on sequencing without performance issues. For bigger projects, I would maintain flat footage throughout and grade at the end, potentially involving a dedicated colorist.
Advanced Color Grading Techniques with Adjustment Layers
Color grading is essential for transforming flat footage into a visually compelling narrative. In Final Cut Pro, I start with the automatic color adjustment feature, which optimizes exposure, highlights, shadows, and other elements for an ideal base image. From there, I apply four to five adjustment layers using plugins from Maxon One.
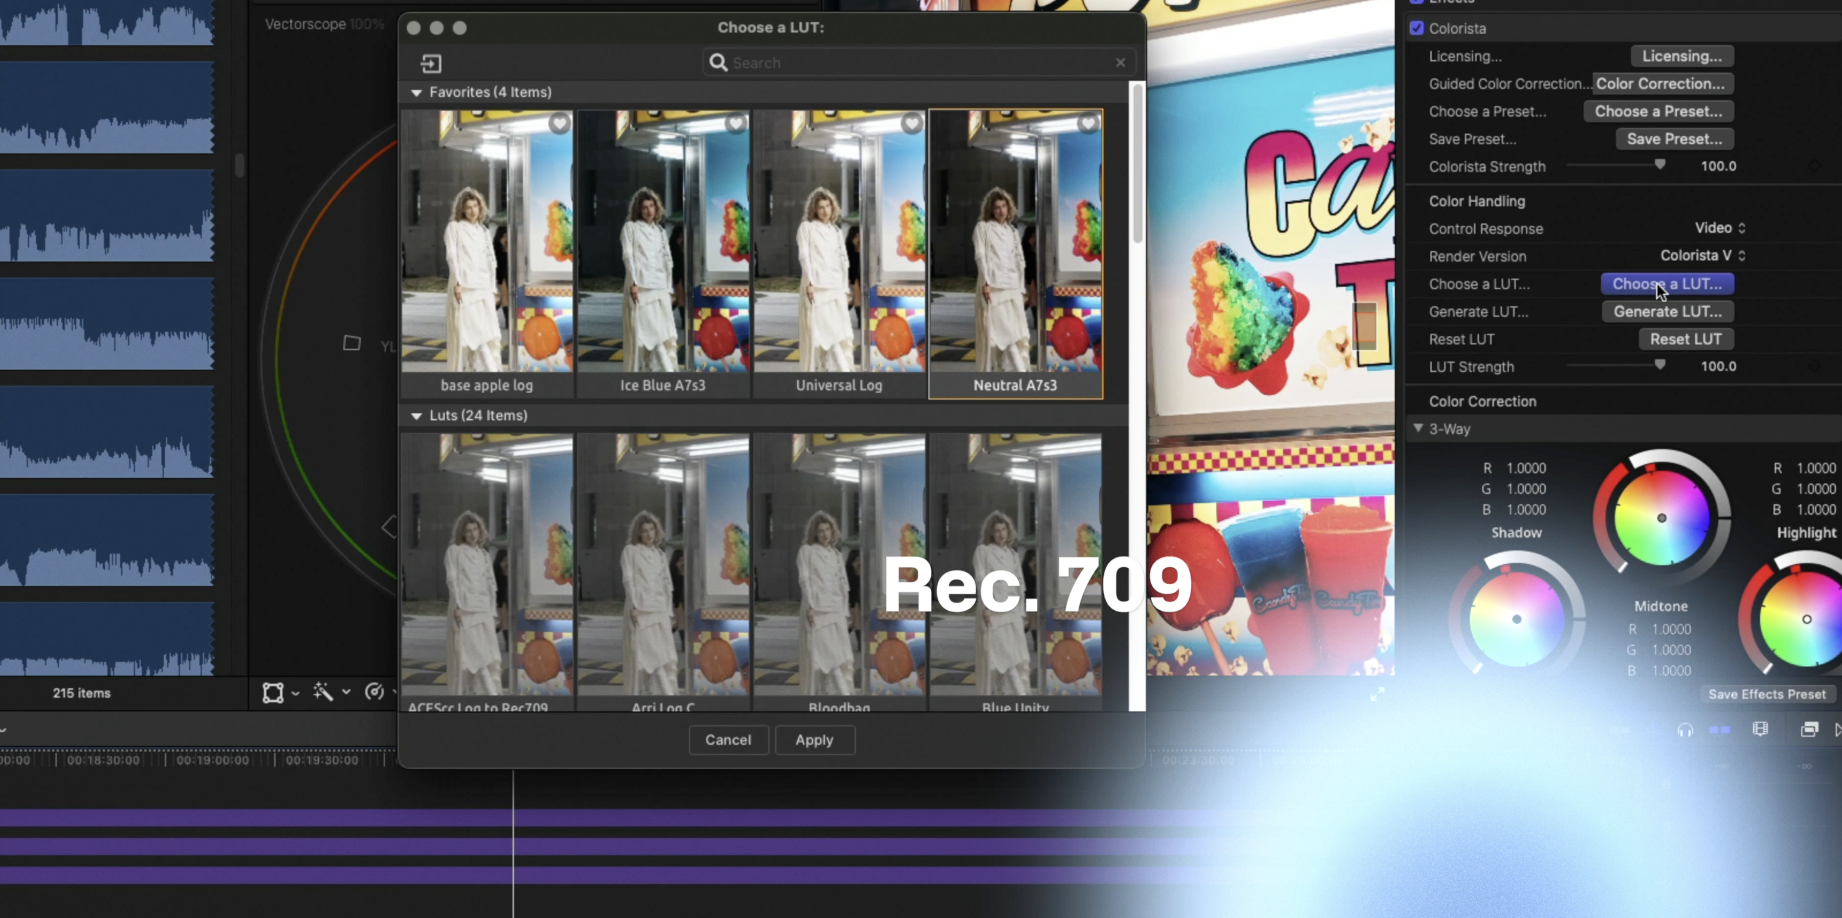
The first layer involves Color Finale (often referred to as Colorista in my workflow), where I apply a LUT to convert the S-Log 2 flat profile to Rec. 709. I then introduce a subtle S-curve to deepen shadows and elevate midtones and highlights, enhancing dynamic range without overprocessing—subtlety is key to a pleasing image.
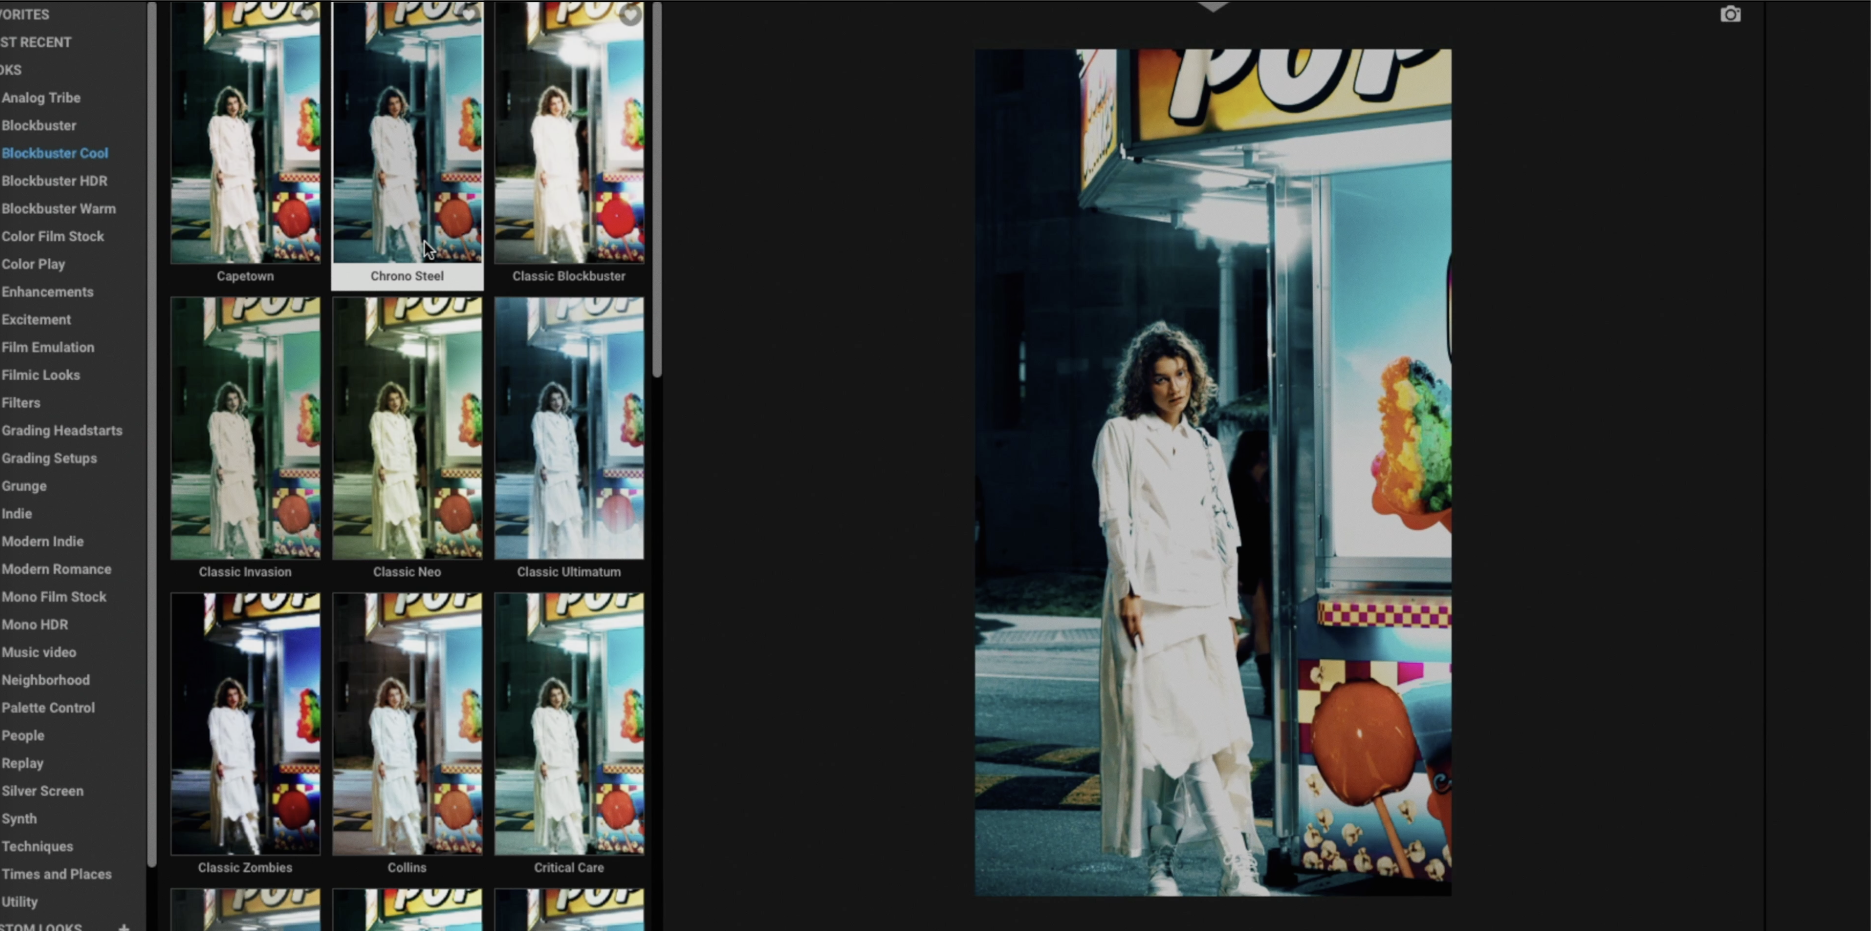
Next, I incorporate Magic Bullet Looks from Maxon One. I often draw from blockbuster-inspired presets across three categories, adjusting the strength to 20-30% or lower to avoid degrading the image. This adds targeted treatments for a refined look.
The third layer features Mojo, another Magic Bullet tool, which imparts a cinematic film aesthetic with a teal-and-orange palette, evoking professional warmth.
Finally, I use Reno for denoising and sharpening. This plugin adds controlled noise to proof the image against compression artifacts, ensuring sharpness when exporting for platforms like Instagram.
These layers collectively yield a high-quality, compressed-ready export that maintains integrity.
Integrating Assets for a Vintage Film Aesthetic Using Eagle Software
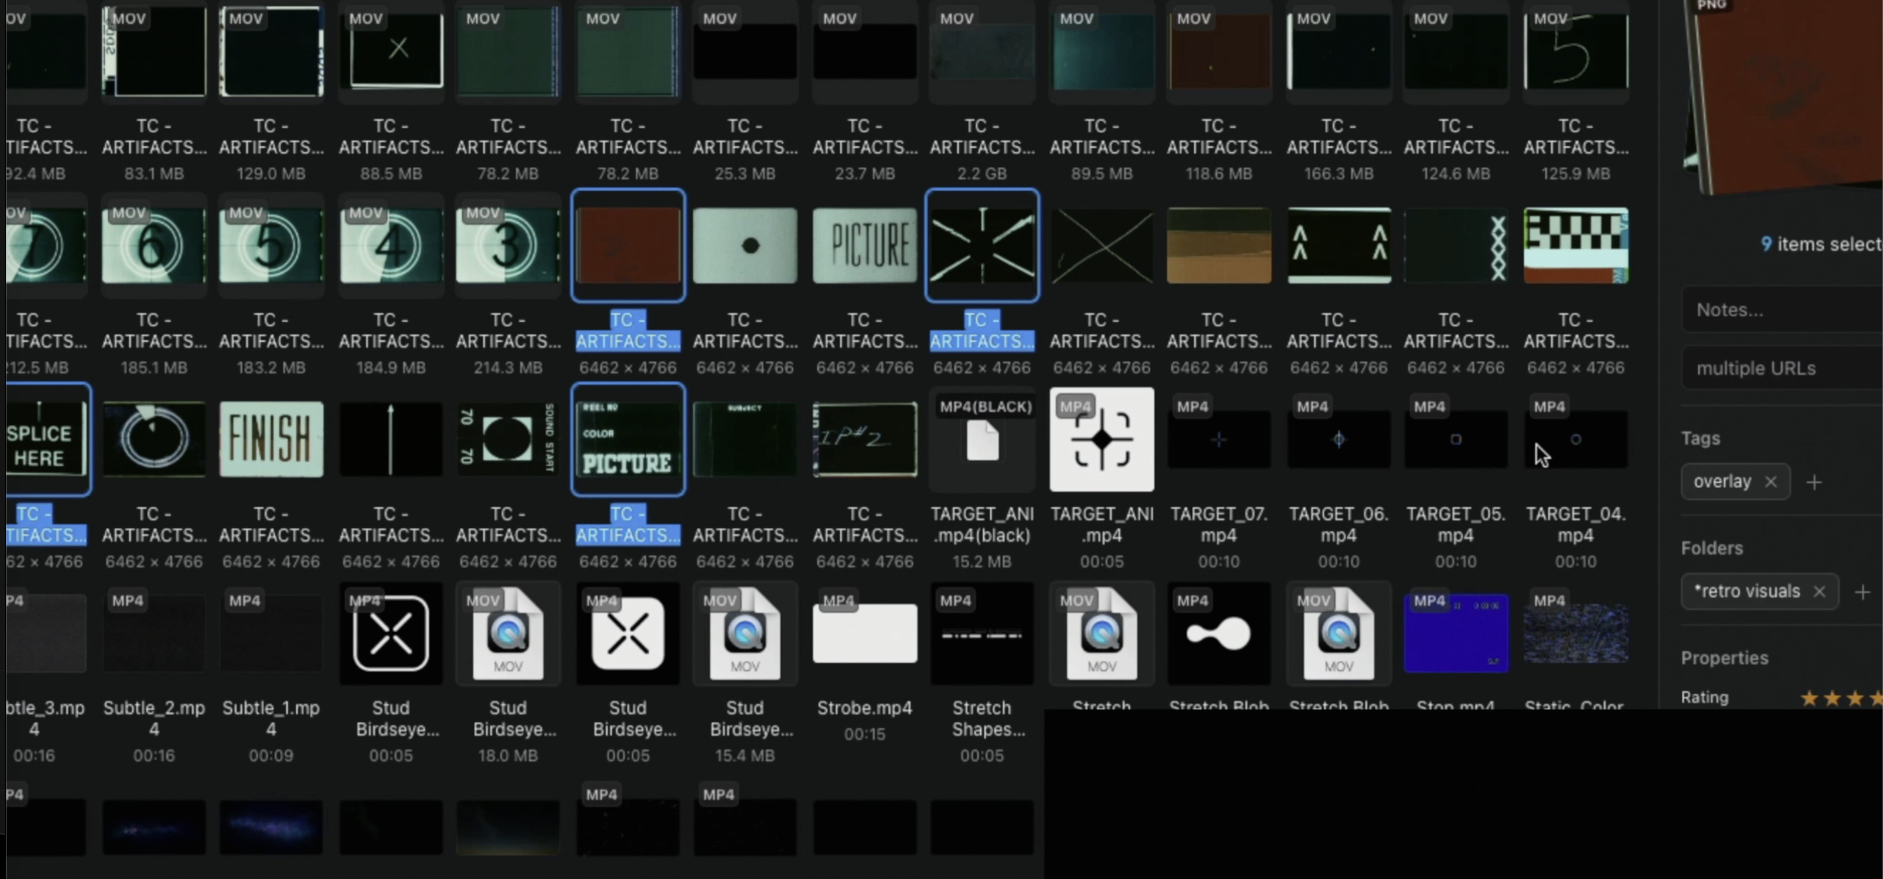
To add depth and engagement to the video, I incorporate assets like film burns and vintage effects. For efficient management, I rely on Eagle Software, a dedicated viewer that stores all my assets in one place. Unlike using Finder, Eagle allows tagging, starring, and advanced categorization, enabling quick access and drag-and-drop integration into the timeline. This streamlines the creative process, especially for videographers handling numerous elements.
In this CNE project, after finalizing the sequence and syncing cuts to music beats, I overlaid assets from Eagle to achieve a vintage film look. I placed an adjustment layer above these assets and applied Magic Bullet's Film plugin, emulating various film stocks to blend everything seamlessly. This prevents the assets from appearing artificial or overly sharp, ensuring they complement rather than distract from the footage. I typically reduce the plugin's intensity to 40-60% based on visual assessment.
Other options like Dehancer Pro exist for film emulation, but I prefer staying within the Maxon One suite for consistency. When adding assets, moderation is vital—aim to enhance the shot without overpowering it.
For those seeking similar assets, explore online resources; I will include links in the video description for film treatments and effects packs.


Enhancing Engagement and Finalizing Your Workflow
What aspects of post-production do you find most challenging—color grading, asset integration, or sequencing? Sharing your experiences in the comments could spark valuable discussions among fellow videographers.
In summary, this workflow—from shooting in optimized profiles to advanced grading and asset blending—transforms raw footage into polished Instagram content. By focusing on tools like Final Cut Pro, Maxon One plugins, and Eagle Software, you can achieve cinematic results efficiently. I hope these insights inspire your next project and provide actionable tips for your Instagram videography post-production.
If you found this helpful, I would appreciate a like and subscription to my channel for more tutorials on videography workflows, color grading techniques, and creative editing. Thank you for reading, and have a great day!